Welding of objects in CorelDraw is demonstrated with this piece of tutorial on how to create a logo with welded shape. The good thing here is that although this logo was designed using CorelDraw 12, you can also use CorelDraw X3, X4 or X5 to do the same once you understand the procedures. We aspire to create the logo shown below at the end of this tutorial:
Fig. 1
 In this fragment of CorelDraw training, and in addition to welding of objects in CorelDraw, you shall learn how to:
- Draw a Circle
- Create a Rectangle
- Align and distribute objects
- Apply Transformation to Duplicate an object
- Type Texts and Fit Text to Path
- Draw a Star
- Fill an Object
- Edit an object's Outline
- Insert Character
- Group Objects
Create a Circle
1. Open the Ellipse flyout and click the Ellipse tool. Hold down ‘Ctrl’, and drag in the drawing window to draw a circle.
2. Click the ‘Pick’ tool, and make sure the circle is selected.
3. Specify the following dimensions in the ‘Object(s) size’ fields on the property bar:
Width = 2.5”
Height = 2.5” and then hit ‘Enter’
Next, we create a rectangle as follows:
Create a Rectangle
1. Open the Rectangle flyout, and click the Rectangle tool. Drag in the drawing window to draw a rectangle.
2. Click the ‘Pick’ tool, and ensure the rectangle is selected.
3. Specify the following dimensions in the ‘Object(s) size’ fields on the property bar:
Width = 0.387”
Height = 2.938” and then hit ‘Enter’
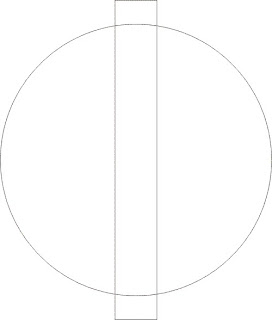
4. Move the rectangle over the center of the circle
Note: For the rectangle to be on the exact center of the circle, they both must share a common ‘central point’. To ensure this, do the following:
Align the objects
1. Click Edit menu > Select All > Objects. Both objects are selected.
2. Click Arrange menu > Align and Distribute > Align and Distribute… The Align and Distribute dialogue box displays.
3. Choose the ‘Align’ tab.
4. From the ‘Align objects to' list box, choose ‘Active objects’.
5. Enable each of the two ‘Center’ check boxes.
6. Click ‘Apply’. The objects now have a common central point.
7. Click ‘Close’.
The drawing should look this:
Fig. 2
Apply Transformation to Duplicate Rectangle
1. Click Arrange menu > Transformations > Rotate. The Transformation docker is displayed to the right of the window.
2. Select the rectangle.
3. In the ‘Angle’ field, enter 18.0
4. Click ‘Apply To Duplicate’. The rectangle is duplicated.
5. Repeat step 4 until the entire circle is populated with rectangles.
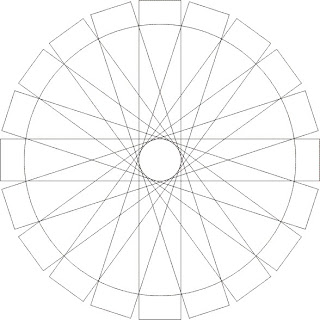
Your drawing should appear as the one shown below:
Fig. 3
 Next, we weld the objects.
Weld the objects
1. Click Edit menu > Select All > Objects. All rectangles and circle are selected.
2. Click Arrange menu > Shaping > Weld.
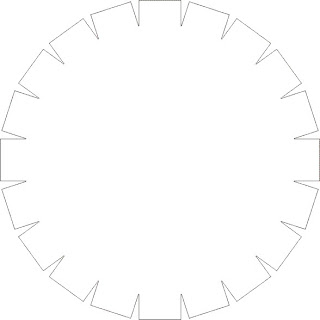
The drawing looks this:
Fig. 4
 It’s time now to create the inner circles.
 Create the inner Circles
1. Open the Ellipse flyout and click the Ellipse tool. Hold down ‘Ctrl’, and drag in the drawing window to draw a circle.
2. Click the ‘Pick’ tool, and make sure the circle is selected.
3. Specify the following dimensions in the ‘Object(s) size’ fields on the property bar:
Width = 2.409”
Height = 2.409” and then hit ‘Enter’
4. Perform the steps under “Aligning the Objects”
5. Click anywhere in the drawing window to deselect both objects.
6. Select the circle and press ‘+’ to duplicate it. The duplicate circle is superimposed on the original in the same position. Perform either of steps 7 or 8
7. To resize the duplicate circle, press down Shift and drag the north-east grab handle of the selected circle inward. Release the mouse when done.
8. Alternatively, specify its dimensions as follows:
Width = 1.832”
Height = 1.832” and then hit ‘Enter’
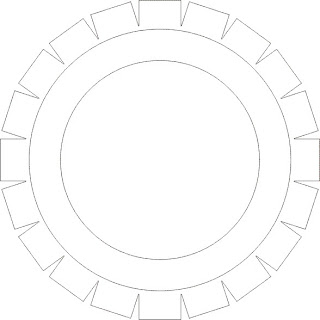
Your drawing looks this:
Fig. 5
 That’s pretty easy. Isn’t that? Alright, let’s proceed and add some texts.
Type Texts and Fit Text to Path
1. Click the Text tool and point to an empty area on the drawing page. The pointer changes to a cross with the letter A below.
2. Click the empty area and type ‘KTB DEMONSTRATION’
3. Click the Pick tool.
4. On the property bar, set the text properties as follows:
Font = Arial Black
Font Size = 16
5. On the menu bar, click Text > Fit Text To Path. The mouse pointer changes to a large dark arrow.
6. Point to the outer edge of the innermost circle and click. Your text should be fitted to the arc if you performed the steps in the right order.
7. On the property bar, set the ‘Distance from Path’ to 0.05”. This shifts the text from making contacts with the arc. At this point, the circle and the text are combined together. This means they are a single object and must be broken apart in order to be able to fit another text to the path. 8. Click Arrange menu > Break Text Apart.
Note: If ‘Break Text Apart’ is greyed out, deselect and select again.
9. Click an empty area of the drawing page to deselect both text and circle.
10. Goto step 1.
11. Click the empty area and type ‘HIGH SCHOOL’.
12. Repeat steps 3-6. The text is superimposed on the first text on performing step 6. But we need it at the bottom of the arc, so let’s put it just right there.
13. On the property bar, set the ‘Text Placement’ field to the third option.
14. Edit the text properties on the Property Bar as follows:
Click ‘Place on Other Side’ button
‘Distance from Path’ field = -0.25”
15. Repeat step 8.
Good work! The drawing looks this at this point:
Fig. 6
 It’s time now to add separators between the texts to make each stand out. We will be adding two star shapes here.
Draw the Star
1. On the Toolbox, click Basic Shapes flyout and then click Star Shapes.
2. Drag in the drawing window to draw a Star shape.
3. Define the following dimensions for it on the Property bar
Width = 0.278”
Height = 0.318” and then hit ‘Enter’
4. Move the shape in-between the ‘K’ and the ‘H’ in ‘KTB DEMONSTRATION’ and ‘HIGH SCHOOL’ respectively.
5. Press ‘+’ on the keyboard to duplicate the Star shape.
6. Use the right-arrow key to move the duplicate to the space between the ‘N’ and the ‘L’ in ‘KTB DEMONSTRATION’ and ‘HIGH SCHOOL’ respectively.
The drawing should look this at this point:
Fig. 7
 It’s time now to fill our objects with the beautiful colours, get ready!
Fill the Objects
1. Click the Pick tool > Select the innermost ‘circle’
2. On the ‘Colour Palette’ choose ‘Cyan’.
3. Click the Pick tool > Select the second ‘circle’
4. On the ‘Colour Palette’ choose ‘Red’.
5. Click the Pick tool > Select the ‘welded shape’
6. On the ‘Colour Palette’ choose ‘Blue’.
7. Click the Pick tool > Select the first ‘star’
8. On the ‘Colour Palette’ choose ‘Black’.
9. Click the Pick tool > Select the second ‘star’
10. On the ‘Colour Palette’ choose Black.
11. Click the Pick tool > Select the first ‘text’
12. On the ‘Colour Palette’ choose ‘White’.
13. Click the Pick tool > Select the second ‘text’
14. On the ‘Colour Palette’ choose ‘White’.
Still on the quest to beautify our work, let’s tweak the outlines a bit. You may use the Zoom tool to Zoom-in as you perform the subsequent steps.
Edit the Outlines
1. Click the Pick tool > Select the inner circle
2. Click the Outline flyout > No outline button
3. Click the Pick tool > Select the outer circle
4. Click the Outline flyout > No outline button
5. Click the Pick tool > Select the welded shape
6. Set the ‘Outline Width’ to 2.0pt on the Property Bar.
7. Right-click ‘Red’ on the ‘Colour Palette’. This applies a red outline colour to the welded shape.
Fig. 8
 Now it’s time to add the books to the drawing.
Insert Character (books)
1. On the Menu Bar, click Text > Insert Character. The Insert Character docker is displayed to the right of the window.
2. In the ‘Font’ field, choose ‘Webdings’.
3. In the ‘Code Page’ field choose 1252(ANSI Latin- I) if it’s not the default.
4. Scroll down the character set and locate the books.
5. Drag the selected character (books) into the drawing page. You may close the docker.
6. Resize the books to 0.809” X 0.847”on the property bar
7. Drag the books inside the center of the inner circle.
Fill the Books
1. Click the Pick tool.
2. Select the books.
3. Click ‘Black’ on the ‘Colour Palette’.
Oops! Did that go well? I don’t think so. Just check out what the final drawing looks like. Our books have white linings (sides) just like every other normal book, but here we are having books that inherited the Cyan colour of the background circle. Let’s correct this!
4. Right-click the ‘books’ and choose ‘Break Curve Apart’.
5. Click an empty area of the drawing window to deselect.
6. Click the books to select them. [Only the back cover is actually selected].
7. Move the ‘down arrow’ key to move down the selected object. Press this key ten times. This separates the back cover from the sides.
8. Deselect by clicking an empty area of the drawing page.
9. Hold down the ‘shift key’ and click on each of the separated sides of the books [multiple selection].
10. Click Arrange menu > Order > To Front.
11. Click ‘White’ on the ‘Colour Palette’.
12. Select the cover.
13. Use the ‘up arrow’ key to move it up. Remember you moved down ten spaces, now you must do same to place it at the exact position.
What do you see? Good work. Our job is almost complete. Let’s wrap it up by making the drawing a ‘whole’ instead of having multiple distinct objects. To achieve this, we group all objects together.
Group all Objects
1. Click Edit menu > Select All > Objects.
2. On the menu bar, click Arrange > Group.
Note: When you group two or more objects, they are treated as a single unit. This lets you apply the same formatting, properties, and other changes to all the objects within the group at the same time. CorelDraw also lets you group other groups to create nested groups.
The final drawing looks this:
 I do hope you find useful this tutorial on how to create a logo by welding of objects in CorelDraw.